


Imagine transforming a barren patch of land into a lush garden oasis, where every seedling thrives, shielded from harsh weather and pests. This isn’t just a gardener’s dream but an achievable reality, thanks to the art of polytunnel construction. Whether you’re an experienced green thumb or just venturing into the world of gardening, mastering the setup of a polytunnel can be your ticket to year-round cultivation success.
Over recent years, the popularity of polytunnels has surged, with countless gardeners heralding them as game-changers. These versatile structures offer a controlled environment that significantly extends the growing season, allowing plants to flourish even in the bleakest of winters. But how do you navigate the maze of construction details to create your horticultural haven? In this step-by-step guide, we’ll walk you through the essentials, ensuring that you have all the knowledge and confidence needed to embark on your polytunnel construction journey.
Choosing the Right Location for Your Polytunnel
Selecting the optimal location is the very first and one of the most crucial steps in any successful polytunnel construction project. Begin by observing the sun’s path throughout the day—most fruiting plants require at least six to eight hours of direct sunlight, so a south-facing position typically works best in the northern hemisphere. Additionally, consider the prevailing wind directions; placing your polytunnel in a spot that is sheltered from strong gusts will help to prevent heat loss, reduce frame stress, and minimize the risk of cover damage. If natural windbreaks like hedges or fencing aren’t available, you may need to install artificial barriers or orient the tunnel to take advantage of the wind’s patterns.
Drainage is another key factor. Avoid low-lying or waterlogged areas where standing water can accumulate, leading to root diseases and structural instability. A slightly elevated or gently sloping site will encourage runoff and protect your investment. Accessibility also plays a part—proximity to water sources, electricity, and storage areas can streamline daily tasks and maintenance. Finally, make sure there’s enough clearance around the site for any equipment you’ll use during installation and routine care; tight spaces make polytunnel construction and subsequent upkeep far more challenging.
Selecting the Ideal Size and Shape
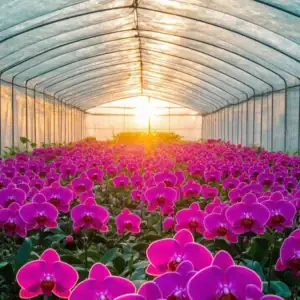
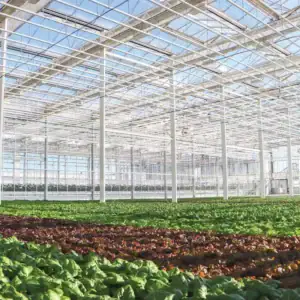
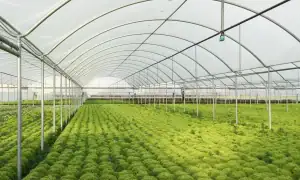
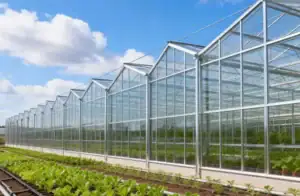
Picking the right dimensions and design for your polytunnel hinges on your gardening goals, available space, and budget. First, assess what you plan to grow—tall tomato plants or vine crops may demand a higher peak height, while low-growing salad greens can thrive under shorter roofs. Standard hoop tunnels are cost-effective and quick to erect, featuring semi-circular arches that maximize internal space. Alternatively, gothic arch designs offer improved rain and snow runoff thanks to steeper slopes, reducing maintenance after storms. Lean-to models can attach to existing buildings for added strength and shared resources like water pipes or power.
Width and length are equally important. A width of 12 to 18 feet is common for home gardeners, providing enough room for multiple beds without compromising structural stability. Length can vary widely—from a compact 10-foot tunnel to extensive 60-foot-plus spans—so choose based on how many crops you wish to rotate. Keep in mind that as the size increases, so do material and labor costs, potential heat management challenges, and the complexity of polytunnel construction. It’s often wise to start with a moderate size and expand later as you gain experience.
Preparing the Ground for Installation
Proper site preparation lays the groundwork for a sturdy, long-lasting polytunnel. Begin by clearing the area of rocks, roots, and vegetation to create a clean slate. Leveling the ground is imperative; even slight slopes can strain the frame and connection points once the covering is in place. Use a spirit level and straightedge to identify high spots and fill low areas, or consider a light grader rental for larger sites.
Next, improve soil stability and drainage: loosen compacted soil with a rototiller, incorporate organic matter like compost or well-rotted manure, and, if necessary, install gravel or perforated drain tiles in persistently wet spots. Mark out the exact footprint of your polytunnel using stakes and string, ensuring straight lines and correct dimensions. If you’re in a windy area, dig deeper for anchor points or add concrete pad anchors to secure the base rails. With meticulous ground preparation, the frame assembly and cover fitting stages will proceed smoothly, setting you up for successful polytunnel construction.
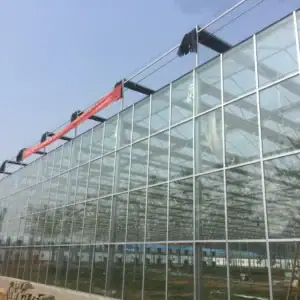
Installing Coverings and Ventilation Systems
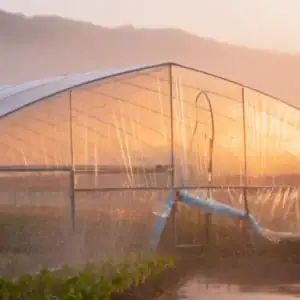
Once the frame is assembled and anchored, the next major step in polytunnel construction is fitting the covering. High-quality UV-stabilized polythene film is the most common choice; opt for a double-skinned cover if your climate demands extra insulation. Begin by unrolling the sheet along one side of the structure, fastening it to the base rail with specialized clamps or battens. Walk around methodically, smoothing out wrinkles and tightening as you go to prevent sagging. A properly tensioned cover ensures rainwater beads off rather than pooling, which extends the material’s lifespan.
Ventilation is equally vital for temperature control, humidity management, and disease prevention. Side vents or roll-up doors allow cool air to enter at crop level, while roof vents release rising hot air. Manual systems are budget-friendly, but automatic vent openers—using wax pistons or thermostatic hinges—provide hands-free regulation, opening and closing as temperatures fluctuate. For larger tunnels, consider installing circulation fans to eliminate heat pockets, especially on sunny days. A balanced approach to covering installation and ventilation setup will guarantee that your polytunnel environment remains optimal year-round.
Conclusion: Enjoying the Fruits of Your Polytunnel Labor
With each stage of polytunnel construction complete—site selection, sizing, ground prep, covering, and ventilation—you’re now poised to reap the rewards of an extended growing season. Track your crop performance, adjust watering and feeding schedules, and tweak venting to fine-tune conditions for optimal yields.
Your polytunnel is more than just a structure; it’s a testament to careful planning and hands-on effort. As vibrant greens emerge and harvests multiply, you’ll appreciate how this controlled environment transforms ordinary gardening into a year-round venture full of potential.
